Showing posts with label glass painting. Show all posts

Friday, 3 April 2026

Glass painting

There is something of the spiritual about glass and even though it is expensive for myself to get access to the specialist kiln equipment needed to fire it, I am drawn back to it like a moth to a flame. I have recently been revisiting glass painting and looking at how some of my existing drawn images could be translated and redeveloped using traditional glass painting techniques. I have in past blog posts looked at some of these in detail here and here, but there is always something new to learn and this was again the case. 

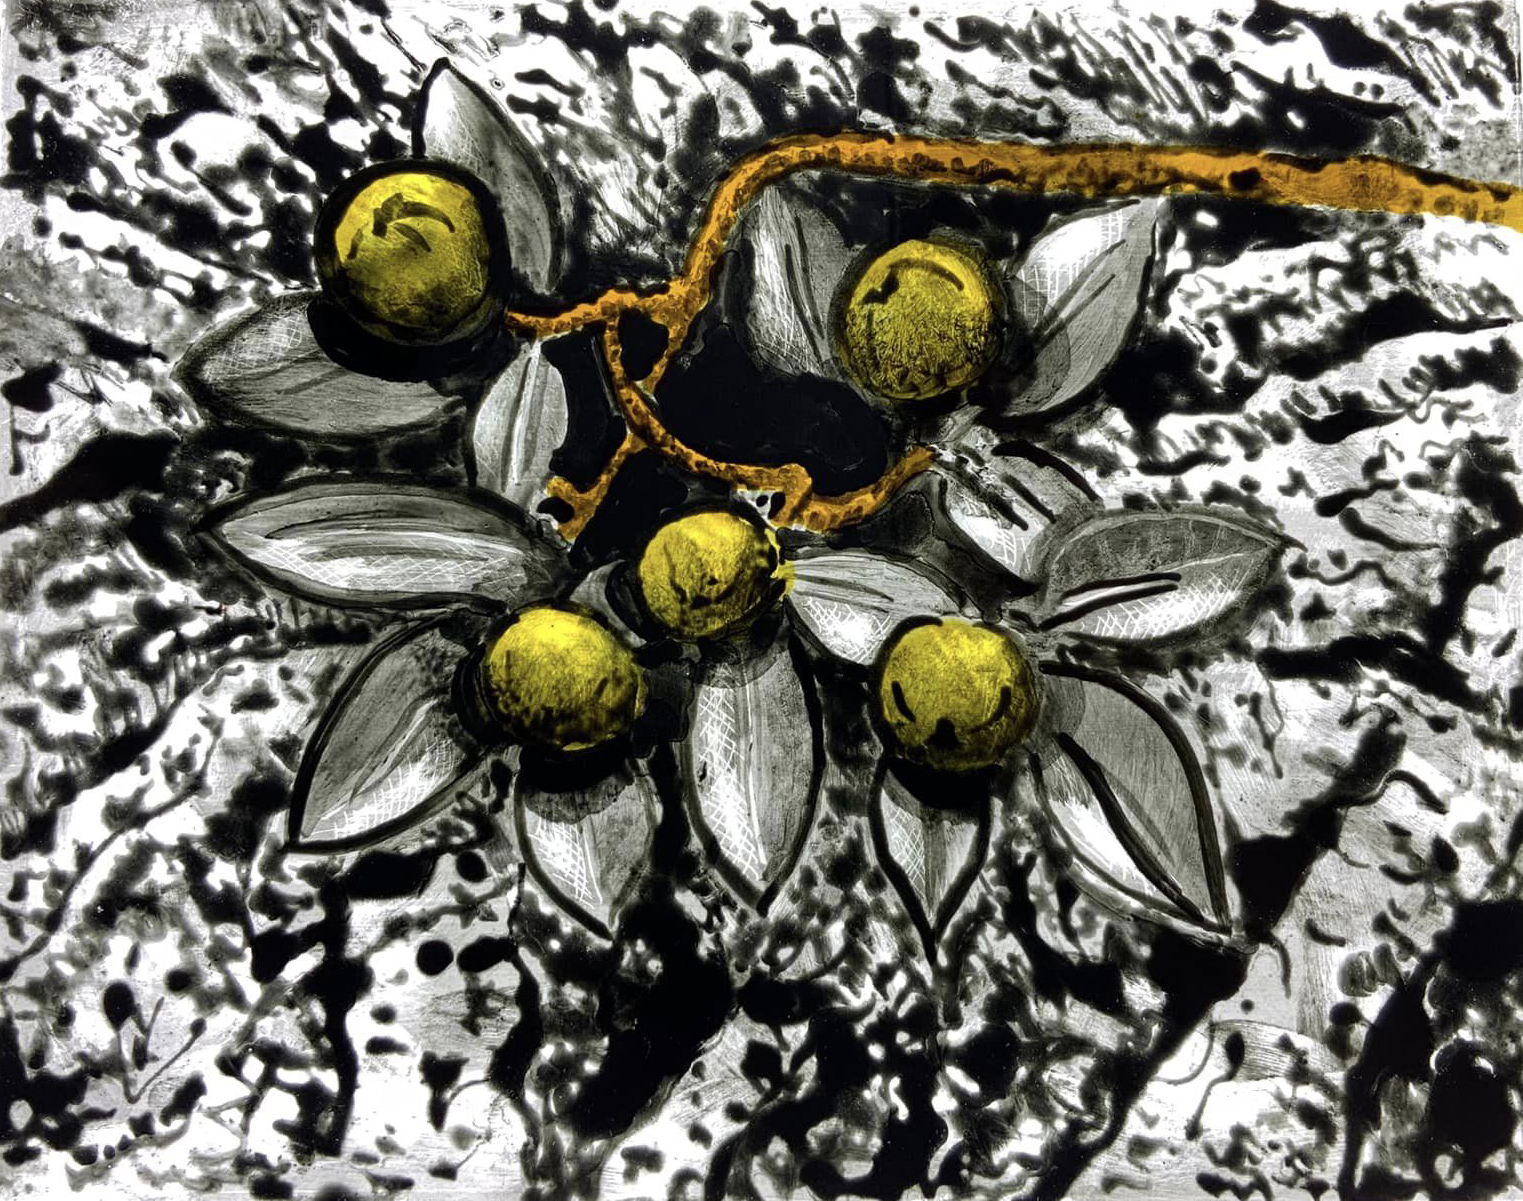
One of the areas of my work that I am always looking at improving is that of expressive mark making. Therefore one of the things I took into the workshop was an existing image where I had tried to visualise an interoceptual awareness of an acid reflux attack, an event that caused both heartburn and stomach sickness. The visualisation, made using inks and watercolour on paper, didn't work well enough, it was too confused and although an image was arriving it wasnt quite there yet, but the translation of the feeling tone, that of the burning sensation in the throat, that was coming from an acidic stomach, was I felt at least coming into view.

Acid reflux: ink and watercolour

In the original image I had tried to express the relationship between the stomach sickness and the heartburn by juxtaposing blue and orange complementaries, the orange flowing out of the blue of an imagined twisted intestine. The expressive quality of the application was an attempt to suggest the emotional nature of an event that also woke me up and had me gasping for breath.
I worked very closely from the original, as it was made on the same day as the event I was trying to communicate and I didn't want to lose that immediacy. However this time the various drawn textures had to be thought through much more in depth, each one the result of trial and error and the application of various amounts of lavender oil and pre-treatment of the glass surface. For instance oil rubbed into the glass beforehand enabled a very different texture to be achieved in comparison to the glass that had not been pre-oiled. I used brushes, a dip in pen, porcupine quills, a palette knife, fingers and crumpled paper pushed into the paint. Sometimes being very precise and at other times just letting the textures arrive as I played with possibilities. The final image was far more intense than the one I was working from and the elimination of colour allowed for a much clearer realisation, alongside the fact that I had made the image slightly narrower, that put more emphasis on the vertical travel of the sensation. 

Acid reflux: Fired painted glass

Unfortunately I managed to break the glass as soon as I got home but even that was in some way a helpful event, as it reminded me that both the initial experience and my feeling about the breakage were in some way linked. The experience I was trying to visualise was one whereby my body was feeling broken inside. I was now 'fixed' and in a position to remember the experience without any associated trauma. Perhaps a repair of the glass would echo this. 

The break
Repaired glass

Another drawing I took with me to the workshop was one whereby I had tried to visualise one of the stories told to me by a migrant to Leeds who had travelled across the Mediterranean in a small boat. He had, he told me, a guardian angel in the form of a rabbit and he would look over the side of the boat to see if the rabbit was still following him, often catching glimpses of his guardian in the swell surrounding the boat. I had tried to represent this moment several times, never quite getting it right. This time I rearranged the image as a vertical, using the ability of lavender oil as a pigment carrier to suggest a liquid environment. The man's finger points to an eye in a wave form, enough suggestion I felt to then trigger an identification of the form with a rabbit's head. Because I had to keep the ink flowing in order to render the image as a whole, it felt as if it was more in keeping with the subject matter. 
 
Man at sea spots his guardian rabbit amongst the surrounding swell: Fired painted glass

The flowing line needed to make the 'Man at sea' image was an approach to drawing I also felt I needed for one of my interoceptual portraits, in this case of a man who used to be a runner, but who now because of hip problems, can only walk with the aid of a stick. He has put on weight since his running days, but still sees the runner within himself, even if he is the only one left who can see himself as he formally was. The constraints of glass has helped simplify the image. 

Digital print

Painting on glass

The two versions above are before and after firing, there is a shadow of the pen drawing, cast onto the white paper underneath the image, at some point it needs inserting into a light-box or window frame. This was a very different image to the next two, both done in response to internal feelings, the one was a response to bad earache and the other a general feeling of malaise. 


Interoceptual portraits: Fired Painted Glass

Each time I revisit glass as a medium to work in, I learn new things about it. I hadn't realised I could keep a flowing line moving at the pace I needed, thinking that I would not find an equivalent to my pen and ink drawings made on paper. Because the glass is so smooth the line runs even faster and you can control the speed by laying down a very thin wash of lavender oil which gives a slight hold to the nib as it passes over the surface, the final images are a better resolution of the idea than the earlier drawings, in particular because of the central concept, that you can 'see' the inner man that still exists inside a now much older and time ravaged body. 
In the case of the interoceptual portraits, it was also the use of a brown alongside the black that I was interested in. It made the images feel 'dirty' and more of the earth and I thought that this grounded what were images of invisible feelings, giving them the gravitas of a perceived reality. I was also looking for a language that had to do with the insides feeling warmer than the outside air and the frustration of not having any physical control over interoceptual sensations, hence no arms or legs. 

Easing the pain

I finally returned to an image that I had begun, but not quite managed to resolve. It was a visualisation of a story told to me by one of the patients I had been working with. During the night his spinal injury would become very painful and being an inventive person, he discovered that his bed was jointed and that it could be adjusted by himself by using the power buttons alongside it. He had found an angle for the bed to be at, that when he lay over it, it helped relieve his pain. He was though getting into trouble from nurses for playing with his bed settings during the night and making adjustments that hadn't been ratified by medical staff. My problem had been that I used fused glass frit to develop the image but I had lost the man in the feeling tone. I managed to bring him back by eventually simply drawing a looping line in black oil based paint and having it fired, so that it was integrated into the coloured frit surface. 

Once again I have to thank Jo-Ann of Hannah Stained Glass for all her help and support. 

See also:


Sunday, 24 December 2023

Stained glass: Session eight

Study for Sooty as an animist fetish/transitional object 

Session eight was focused on painting. This time the body of the Sooty puppet and the arm it is attached to were the subjects. This is a particularly important aspect of the idea. I want to suggest that in all animist conversations, (i.e. between humans and non human entities) there is an element of the spiritual. In this case because of the specific history of stained glass I was interested in channelling depictions of the Lamb of God. 


Stained glass depictions of the Lamb of God

After looking at how the fleece was depicted, I made a new study to replace my original one of a Sooty fetish. (See image at the top of this post)

A previous study for a Sooty fetish

The new study as well as exploring textural differences also changed the relationship between the fetish and the audience, this time the Sooty figure stares straight back at the viewer. The different types of glass used were also thought about and my increasing knowledge of working with water based paints as a first layer, has enabled me to have a much clearer idea of what I'm working towards. 

Using water based stained glass paint I laid a graded matte to each section of the bear's body and then worked into these sections with a dry brush technique that was designed to echo how at times hair texture had been rendered historically. 


Sections of the Sooty body with graded matte and hair texture applied

The pads representing the paws of the bear were done slightly differently, using a flooding technique. In order to avoid blistering when fired, when using flooding, you need to mix your paint each time you load your brush. The term 'flooding' is a good description for what happens when you touch a loaded wet brush onto the glass, the paint spreads out from the brush tip. However in my case I wasn't looking for a flat black, so varied the mixes and as the glass for one of the arm/paws was a textured one, this allowed the glass texture to come through. One other thing I was having to bear in mind was how much of the glass the leading would cover, which is why the dark pad is the size that it is. 

A paw with a water based matte and dark 'flooded' pad


I had used an old piece of glass with lines fired into it for the other paw. When I was looking at old stained glass windows, I realised that there were often re-purposed glass components from earlier times. Glass is very expensive and in future I will try and recycle more, this tiny element was a reminder of this. 

Finally some of these sections will have silver stain added to the back, which should harmonise all the colours and give a yellow intensity to the Sooty image, but that will have to be done on the back, so all these sections will need to be fixed by firing before then. 

The next area to look at was the arm and I wanted more texture but of a very different type. Jo-Ann suggested that I explore a particular spray technique and so I did.

A texture test made by spraying water droplets over a matted surface

Using a spare piece of glass a graded matte was made using water based paint applied with a large hake brush, which was then smoothed and graded using a badger brush, as described in session six. This was dried using a hair drier and after testing that the spray was sufficiently fine, a spray diffuser was used to spray a fine mist of water over the glass. Just one short burst of spray was used, a long one would mean the water would begin to run off the surface. Again the glass was gently dried off using a hair drier. Once dry the badger brush was very lightly fanned over the surface with the faintest of contacts and as this was done gradually the texture of water droplets was revealed. Once I had grasped the technique I applied it to the two sections of pink glass that made up the arm. 

The final task of the session was to return to the leg which has now been fully fired and to stop out by flooding the area between the leading and the trace line.
 
Paint being mixed ready to go over the trace line

A fine line drawn over the existing trace line

The first thing to do was to draw a fine line over the existing trace line. This forms a barrier to protect the rest of the glass from the flooding.

Flooding is applied between the trace line and the area that will be bounded by leading.

Then flooding was applied as it was for the pads that sit within the paws. This means that when light illuminates the leg there will be no confusion between the line of the leading and the painted line of the edge of the leg. 

See also:

Wednesday, 13 December 2023

Stained glass session seven

I needed to catch up on myself a little, so this session was one where I had to re-cut the glass I broke as well as speed through the painting process, so that I did not have one piece left behind. 

The leg sections after the first firing of the water based paint

After checking that the painted sections of the leg had fired ok, I found the last piece of pink glass big enough to cut the foot shape from again. I'm now fairly confident about cutting, so managed this without mishap. The issue was could I catch up with the painting? I therefore went back to the water based paints, ground the edges down and washed my newly cut foot shape and laid a matt ground and blended it as I had done before. I then left that to one side and began the process of oil painting.

Mixing lavender oil into the dry paint

I had bought a small bottle of lavender oil from Boots during the week, (£4.70) as I knew this would be needed and as I had had a cold it had the added bonus of its smell helping to keep open my airways. Again, as with the water based painting it was important to add the oil very carefully, blending and blending with the small palette knife. 
Once mixed a fine sable brush was used to apply the paint. I had used this technique before and I wanted to use a version of the way I had handled the paint again. I also had a choice as to whether or not to oil the glass surface with the lavender oil before I started, as this can help flow. In this case I decided not to do this. 

Previous example of my stained glass painting, with silver staining for the yellows

The area of paint that surrounds the central image was done using an oil painting technique, over the top of a previously fired water based layer. I was using an almost 'pointalist' technique and liked the way I could use it to vary tonal values. 

Detail showing how the oil paint texture has to be applied to flow across from one piece of glass to the next. 

Painted section now with the foot completed on a switched on light-box

Once I was feeling confident that I could get the quality of image I wanted, I added in the water-based section, painting directly on top of the unfired tone and line drawing. I had to be vary careful not to touch the surface, as this would remove bits or leave marks, but by using a bridge I was able to put the two methods of painting together, so that the foot section could be fired at the same time as all the other leg components. 

Leg section as it appears when the light-box is switched off

You need to keep switching the light-box on, so that you can see how the glass will look when light is behind it. However because the leg section is a long one, it is slightly too long to see it lit all at once. 

Cleaning the brushes was done with neat lavender oil, a paper towel was soaked in it and the brush gently worked into the towel until it was clean and all the time trying to ensure the tip is kept pointed. 

The next area to work on is the figure of Sooty and this is quite problematic, as I need to find a way of making the image work for stained glass. My idea is that the Sooty figure is a sort of fetish and as such is rather like a religious icon. Therefore the style of rendering must indicate this. However first of all the pieces that make up Sooty have to have their edges ground down to remove all the sharp areas that might cut into the expensive brushes used to lay grounds and finally the surfaces are cleaned by being given a good wash in soapy water. 

White Sharpie numbering used to identify where all the parts go

All cleaned and edges ground down

These pieces are now all ready to paint, but I now had to spend time getting my head round how I wanted the final image to work. 

I had an earlier study made to help me think about how the image of Sooty would fit into the surrounding cut glass fragments but it wasn't right, it did though point the way.

Study: Acrylic Paint

The study did not take into account the various different tonal and colour values of the glass that will actually be used. The eyes are in the wrong place and the ears are wrong, but I liked the idea of making Sooty hirsute, it feels more Medieval. Therefore I returned to the cartoon and developed the image of Sooty, to more accurately reflect the decision making that had occurred during the process of cutting glass from fragments that were available in the studio. 

The stained glass Sooty before silver staining on the back: Cartoon study

Thinking about the fetishistic hairyness of Sooty

To complete Sooty the eight pieces that make up the body will need to be visually cohered and to do this the two clear sections of glass will need to be silver stained on the back, this will even out the colour, making it a varied but intense yellow and hopefully add to the fetish/religious relic effect. But I think it will be the painting of the texture and how it is done that will signify the ritualistic nature of the image as fetish. 

From the Vyne Chapel, Sherborne St. John, Hampshire: 1525


In this beautiful image of a dog from Sherborne St. John, you can see overall tonal modelling, as well as texture, and it is something like this that I think I want to achieve. 

Lamb of God

The sacrificial Lamb of God is closer to the concept of image as ritual fetish. The texture is modelled to give an idea of weight and volume to the lamb as a 'lamb', but the lamb is also a spiritual thing, a substitute for Christ. 


Sunday, 3 December 2023

Stained glass: Session six

This was a difficult session, perhaps because I had had my flu jab the day before, I was a bit off colour and not as 'on it' as I ought to have been. Even so we covered a lot of ground and I learnt a bit more about my own capacity for absorbing knowledge. 


The various sections have been put together on the light-box

The first part of the session was placing all the components I had cut so far onto the light-box and ordering them, which was  a complex jig-saw that I would not have been able to do without all the attached numbered paper templates. This allowed me to see how things were looking and for the first time, I was able to judge how well the various parts would balance. After some thought, we also looked at some more offcuts of colour that could go into the border, but these were not cut to length, just to width, so that later on when it is put together, any changes in size can be accounted for before marking out and cutting. 

The heel and fused frit glass section made to represent the heel pain

As I had detached all the numbered paper templates, I decided it was easier to simply number each piece as it was put away, but the templates were saved in case of breakages. 

Today was the first day of painting and I had prepared for it by printing off various sizes of my preparatory drawings. Because I didn't have a copy of the cartoon at home I had to guess sizes and of course one was slightly too big and the other slightly too small. (Note to future self make 2 copies of the cartoon next time). 

Preparatory sketch for leg

The leg is composed of seven pieces and these were what I was focused on for the rest of the session. Before going any further each piece had to have its edges lightly ground, so that the delicate brushes that I will use, don't get cut to bits by sharp glass edges. Once ground, each piece of glass is washed both sides to remove all traces of grease. 


Preparing the palette

The first painting task is to lay a tonal matt over the sections, so that a feeling of light coming in from the right is maintained through all the sections. Using an already set out dry glass palette, my first job was to gradually add tiny amounts of water and to mix and mix with palette knives. This was done on a turned off light-box as it would be hard to assess the mix if the light was on. You are trying to achieve a mound that is stiff and not too runny, and it is so easy to add too much water. Nb when adding water the amount added each time was what adhered to a palette knife blade when dipped into a glass of water; a brush full was too much. 

Once ready a large hake brush is used to spread the paint out thinly over the rest of the palette. To do this in single strokes, not by swirling the paint around, which was how I began. 

A large hake

Doing it one at a time, to now re-clean the pieces of glass by putting on a very thin coat of watery paint and then wiping it off with a paper towel. You can see immediately if there is any grease left on the glass as the thin paint will be rejected. This is done on a turned on light-box. Once all are clean and the light-box cleaned of any spillage, its time to actually begin painting. 

Using the same techniques as before, taking the large hake brush I was able to build up a surface of paint, this time slightly thicker, so I was adding to the mix from my pigment pile. I began on a left hand glass piece as this was meant to be darker and laid the matte ground using long continuous strokes. I then blended these strokes in with a badger brush. 

Badger brush

Paper towels are an essential tool, as they are used to keep everything clean

You can do quite a lot with the badger brush, but I found it hard to eliminate streaks. However I persevered and managed a certain amount of gradated shading. I then took a large hogs hair stipple brush, holding it vertically and making light up and down movements, used it to make a lighter stippled tonal value as I shaded the leg from left to right. 

Large hogs hair brush

Peli glass are the suppliers of the tools needed. They are all expensive and I will buy some, but not all of the equipment needed, as I'm having to work out what could be a minimal toolkit if I had to work from my own studio.

Cleaning off the right hand side of the paired parts of the leg. 

Once the blending was done, I put each pair of glass pieces together on the light-box and adjusted the blend so that it worked across the two pieces and then did the same down the leg as well. I eventually began using a small stencil brush to soften the transition between a wiped off edge and the rest of the matte. 

I was now ready to paint the line of the leg. This I found very hard, as it was about getting the consistency of the paint just right and then even when using a rest, I found my line control suspect and eventually decided a little wobble was fine and that I would embed the feeling into the painting as I added the oil based paint later. 

Things to remember: Using the tip of the brush only, make a figure of 8 to pick up the paint mix. Test out lines on the palette first and practice doing them in one go. A good line maintains a solid black throughout its length. Nb again I failed several times at this. Sometimes achieving the required blackness for the test line, but not for the actual one. I need far more experience here and you need to re-mix the paint and test it for every stroke, which I found very hard as it went against my normal working methods of responding to things as they happen, as opposed to planning every move. 

I had nearly finished these seven sections when I managed to brush one of my finished pieces off the light-box, and onto the floor; it of course shattered. Luckily I still have a piece of pink left, that is big enough to re-cut the foot and I didn't throw away the paper template, but it has put me back somewhat, because all the other pieces are being fired during the week. I shall have to re-cut it next week and lay a graduated tonal matt as well as re-do the line drawing. I should have carefully put each piece away as I did it, but as you also have to keep lining them up next to each other to make sure your line flows smoothly from piece to piece, this is a hard thing to remember to do. 

Items ordered in relation to glass painting: 

Hake brush, large € 15,50
Matting brush, soft flat hair, 3" € 25,71
Tracing brush, Ox hair, size 5 € 7,27
Matting brush, soft flat hair, 1" € 10,09
On top of this as Peli Glass is based in the Netherlands there was handling and shipment to UK, which was € 26,50

Nb. I decided on ordering a matting brush rather than a badger hair brush as these were over £80 each. 

See also: