Sunday, 3 December 2023

Stained glass: Session six

This was a difficult session, perhaps because I had had my flu jab the day before, I was a bit off colour and not as 'on it' as I ought to have been. Even so we covered a lot of ground and I learnt a bit more about my own capacity for absorbing knowledge. 


The various sections have been put together on the light-box

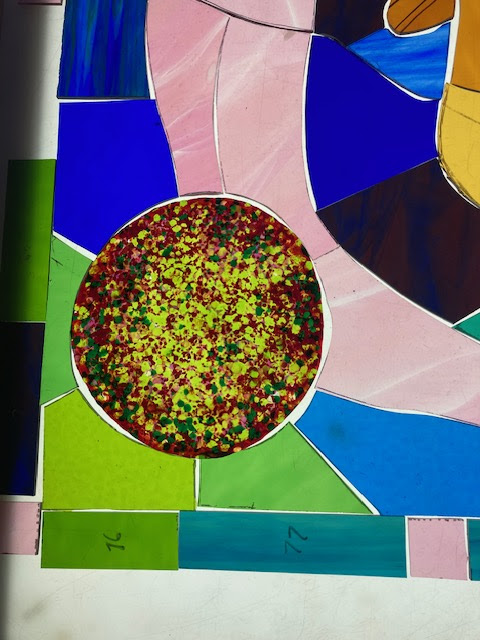
The first part of the session was placing all the components I had cut so far onto the light-box and ordering them, which was  a complex jig-saw that I would not have been able to do without all the attached numbered paper templates. This allowed me to see how things were looking and for the first time, I was able to judge how well the various parts would balance. After some thought, we also looked at some more offcuts of colour that could go into the border, but these were not cut to length, just to width, so that later on when it is put together, any changes in size can be accounted for before marking out and cutting. 

The heel and fused frit glass section made to represent the heel pain

As I had detached all the numbered paper templates, I decided it was easier to simply number each piece as it was put away, but the templates were saved in case of breakages. 

Today was the first day of painting and I had prepared for it by printing off various sizes of my preparatory drawings. Because I didn't have a copy of the cartoon at home I had to guess sizes and of course one was slightly too big and the other slightly too small. (Note to future self make 2 copies of the cartoon next time). 

Preparatory sketch for leg

The leg is composed of seven pieces and these were what I was focused on for the rest of the session. Before going any further each piece had to have its edges lightly ground, so that the delicate brushes that I will use, don't get cut to bits by sharp glass edges. Once ground, each piece of glass is washed both sides to remove all traces of grease. 


Preparing the palette

The first painting task is to lay a tonal matt over the sections, so that a feeling of light coming in from the right is maintained through all the sections. Using an already set out dry glass palette, my first job was to gradually add tiny amounts of water and to mix and mix with palette knives. This was done on a turned off light-box as it would be hard to assess the mix if the light was on. You are trying to achieve a mound that is stiff and not too runny, and it is so easy to add too much water. Nb when adding water the amount added each time was what adhered to a palette knife blade when dipped into a glass of water; a brush full was too much. 

Once ready a large hake brush is used to spread the paint out thinly over the rest of the palette. To do this in single strokes, not by swirling the paint around, which was how I began. 

A large hake

Doing it one at a time, to now re-clean the pieces of glass by putting on a very thin coat of watery paint and then wiping it off with a paper towel. You can see immediately if there is any grease left on the glass as the thin paint will be rejected. This is done on a turned on light-box. Once all are clean and the light-box cleaned of any spillage, its time to actually begin painting. 

Using the same techniques as before, taking the large hake brush I was able to build up a surface of paint, this time slightly thicker, so I was adding to the mix from my pigment pile. I began on a left hand glass piece as this was meant to be darker and laid the matte ground using long continuous strokes. I then blended these strokes in with a badger brush. 

Badger brush

Paper towels are an essential tool, as they are used to keep everything clean

You can do quite a lot with the badger brush, but I found it hard to eliminate streaks. However I persevered and managed a certain amount of gradated shading. I then took a large hogs hair stipple brush, holding it vertically and making light up and down movements, used it to make a lighter stippled tonal value as I shaded the leg from left to right. 

Large hogs hair brush

Peli glass are the suppliers of the tools needed. They are all expensive and I will buy some, but not all of the equipment needed, as I'm having to work out what could be a minimal toolkit if I had to work from my own studio.

Cleaning off the right hand side of the paired parts of the leg. 

Once the blending was done, I put each pair of glass pieces together on the light-box and adjusted the blend so that it worked across the two pieces and then did the same down the leg as well. I eventually began using a small stencil brush to soften the transition between a wiped off edge and the rest of the matte. 

I was now ready to paint the line of the leg. This I found very hard, as it was about getting the consistency of the paint just right and then even when using a rest, I found my line control suspect and eventually decided a little wobble was fine and that I would embed the feeling into the painting as I added the oil based paint later. 

Things to remember: Using the tip of the brush only, make a figure of 8 to pick up the paint mix. Test out lines on the palette first and practice doing them in one go. A good line maintains a solid black throughout its length. Nb again I failed several times at this. Sometimes achieving the required blackness for the test line, but not for the actual one. I need far more experience here and you need to re-mix the paint and test it for every stroke, which I found very hard as it went against my normal working methods of responding to things as they happen, as opposed to planning every move. 

I had nearly finished these seven sections when I managed to brush one of my finished pieces off the light-box, and onto the floor; it of course shattered. Luckily I still have a piece of pink left, that is big enough to re-cut the foot and I didn't throw away the paper template, but it has put me back somewhat, because all the other pieces are being fired during the week. I shall have to re-cut it next week and lay a graduated tonal matt as well as re-do the line drawing. I should have carefully put each piece away as I did it, but as you also have to keep lining them up next to each other to make sure your line flows smoothly from piece to piece, this is a hard thing to remember to do. 

Items ordered in relation to glass painting: 

Hake brush, large € 15,50
Matting brush, soft flat hair, 3" € 25,71
Tracing brush, Ox hair, size 5 € 7,27
Matting brush, soft flat hair, 1" € 10,09
On top of this as Peli Glass is based in the Netherlands there was handling and shipment to UK, which was € 26,50

Nb. I decided on ordering a matting brush rather than a badger hair brush as these were over £80 each. 

See also:

Tuesday, 28 November 2023

Paper: A material conversation

I have been going through some old folders of work and came across some images I made when I used to work with Foundation students paper making. The images were from 40 years ago, but I decided that paper making could still offer interesting possibilities and that it might be something to return to once I have completed the various projects I'm now engaged in, in particular as a way of making surfaces that can have things embedded into them.

The first and possibly most important issue is the 'conversation' that it is possible to have with both the various processes involved and the materials that go into the making of a sheet of paper. Now that I am more aware of animism as an approach to making connections with the world, I'm finding it much easier to let my mind drift into the lives of things that are not human. As to the material nature of paper, the 'ur-history' of cotton rags could also include the previous lives of cotton clothing wearers, as well as rag pickers, whilst some papers may have embedded into their histories stories of mass tree planting for re-forestation. Hand made papers might include vegetable materials available locally, therefore the lives of local plants might be woven into the story. I went to an interesting exhibition in Leeds over the weekend by Invisible Flock, 'This is a Forest'; an exhibition that tells the story of the artists’ journey across sites in Leeds in an attempt to reclaim a part of the city as a forest. I could easily see how paper making could have become much more embedded into the project they were developing, especially if paper had been collected from the various sites explored and then pulped and mixed with plant fibres also available from plants now growing on the sites. There was a handout available made of handmade paper, that used sawdust made from a tree that had died in the Yorkshire Sculpture Park, something that perhaps triggered my thoughts for today's ramble, but I wanted the paper making to be more conceptually embedded into the process. However that was my own 'this is what I would do' response, and it was great to see a big space devoted to a serious attempt to get an idea across in a visual art form. In fact Leeds has been lucky lately and we have had some excellent visual art to experience, such as 'And She Built a Crooked House' by Gemma Anderson-Tempini an exhibition that is still on and which fills the rooms of Burton Grange house in Headingley, as well as the opening last weekend of Hibiscus Rising by Yinka Shonibare. I. e. art matters and if you are a student studying art in Leeds this is a great time to get out and visit these exhibitions. 

However, back to paper making.
If you are going to make a practical start and want to have some results quite quickly there is a basic set-up.
First of all you will need a mould and deckle. The mould is a frame covered with metal or nylon mesh, and the deckle is the frame that sits on top of the mould. This how to do it video suggests that you use two ready made picture frames as a simple and quick way to get these made.


How big your frame is will be vital to how you proceed. If only small you can overlap each sheet as you transfer it and gradually construct much larger sheets.


Your mould and deckle will need to be pushed down into a tub of water with suspended particles of fibre floating in it. But you can get over the need for a deep tub by pouring the paper suspension directly into the mould if you keep it in a large jug. You then need to transfer the wet paper suspension onto a flat absorbent surface, such as a felt mat. 

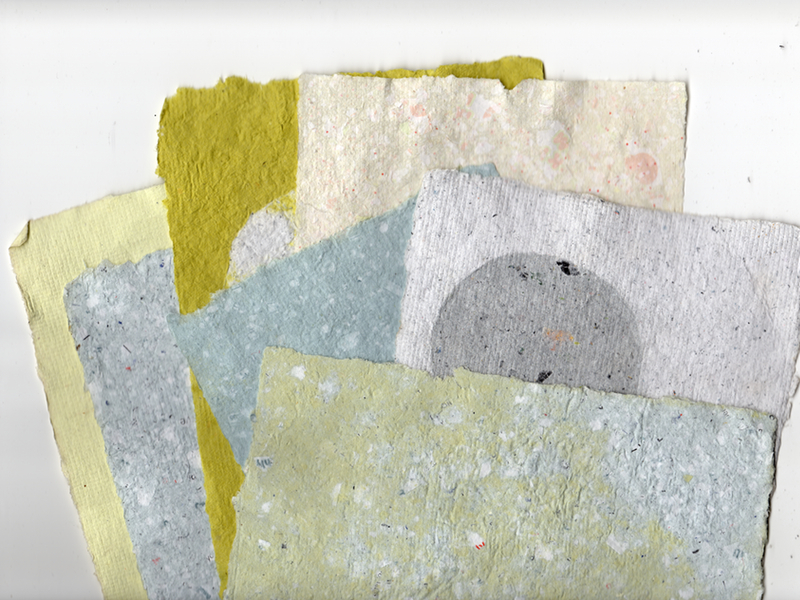
Typical papers made by recycling 


If you follow the simple steps in the guide, one thing you might consider is overlapping the small sheets as you transfer them from your frame, so that you can build larger and larger sheets. As you do this you can also embed other things into the gradually growing area of paper. This takes far more time, but much more ambitious projects can emerge from this. 

David Hockney: From the Paper Pool series

Essentially you are making what is normally thought of as a surface on which to make marks, into a substance that will make your visual communication directly. Either as in Hockney's 'Paper Pools', as a substance that carries the image directly by being 'painted' with, or as a material that can be applied as a new surface on other things, or as in papier-mâché, as a building material.

David Hockney came across the technique of working directly in paper pulp at the Tyler Graphics studios in upstate New York. This involved dyeing wet pulped rag papers, which were then applied in various ways to recently-created and still wet paper substrates, until once a satisfactory image was made, they were finally pressed flat and dried. There were opportunities for Hockney to manipulate the application of colour at all stages and the final result was a cross between paper-making, print-making and painting. I am learning new techniques in stained glass manufacture and in their very restrictions find invention. Hockney also found learning a new technique and its specific restrictions, facilitated invention. He realised the process could be very conducive to variations on a theme, in particular, swimming pools and the effects of different lights and movements on their water. In Paper Pools, Hockney addresses a formal and paradoxical problem: how do you depict the elusive, ever-changing qualities of a body of water, using a flat, stationary, two-dimensional medium? In these images, colour does not sit on the surface, it is fused and completely integrated. Like water itself, light and movement are subsumed into these works, and in doing this, Hockney is able to close a conceptual loop between what is represented and how to represent it.

Peter Gentenaar and Patricia Torley are a couple who specialise in organic paper making. Their website also gives tutorials on how they work with paper, Patricia Torley in particular offers some fascinating insights into possibilities for painting directly in paper and Peter Gentenaar uses paper to develop three dimensional structures. 

Patricia Torley

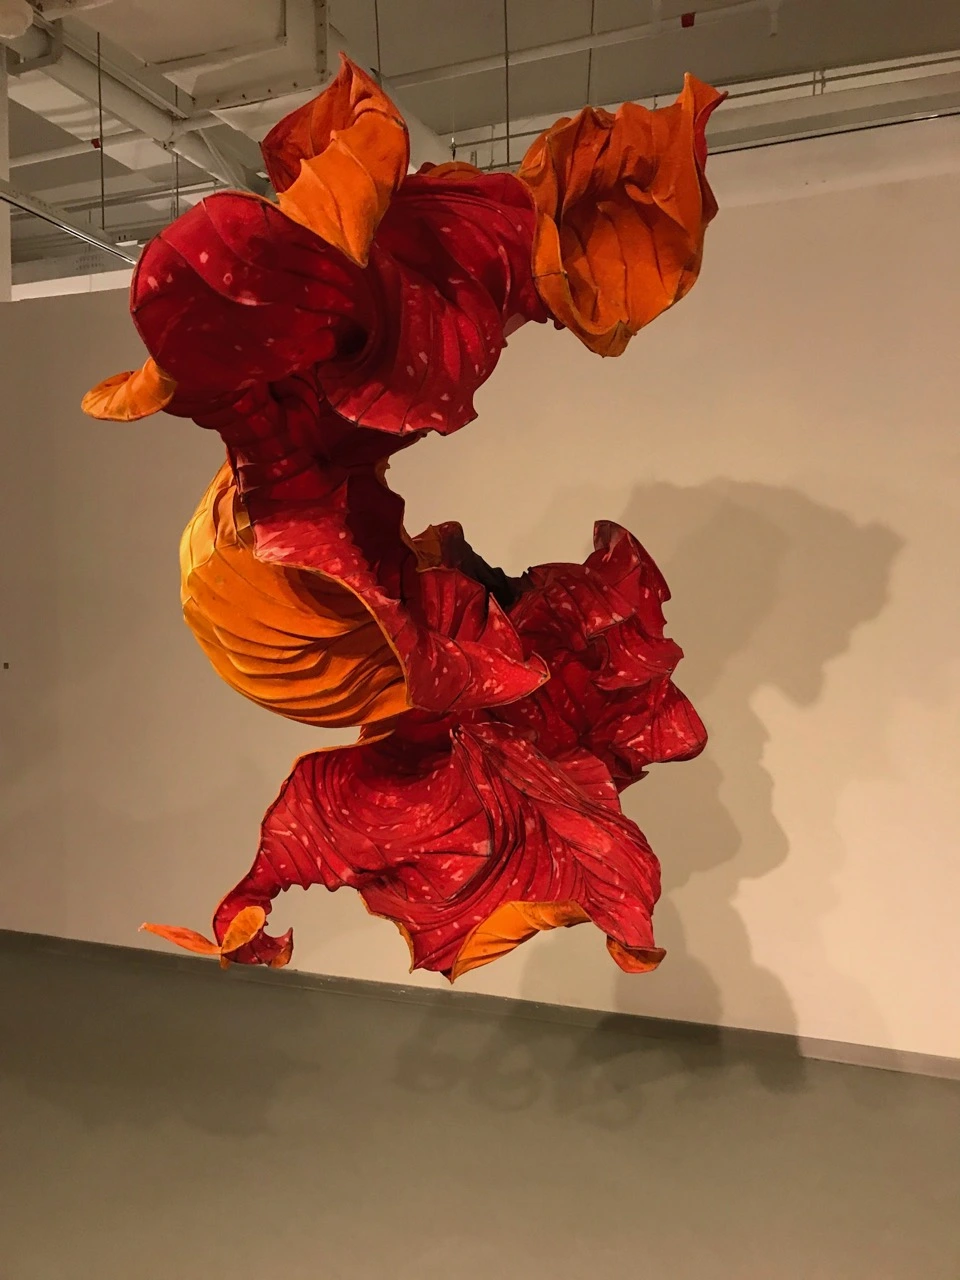
Peter Gentenaar

Hockney has a much clearer grasp of the conceptual issues surrounding this type of approach to image making, but you can learn a lot of techniques and technical approaches to paper working from specialists like Torley and Gentenaar. 


Anthony Caro: Paper sculptures

Anthony Caro used paper casting processes to work through ideas for sculpture. He would press paper pulp onto smooth plaster forms, then cut, fold, squash and join the dried sheets to create ideas for sculpture. 

The artist Wangechi Mutu, often uses paper pulp. In her case she uses an oatmeal-like mush made from a range of papers and added ingredients that are chosen to give the work specific meaning, such as particular soils or coloured dyes. Mutu first came up with her paper formula when adding the final layers to the Afrofuturist sculptures she created for the 2015 Venice Biennale, wanting to recreate the organic look of mud-brick houses traditionally built by women in Kenya. 

Wangechi Mutu: Mirror, 2016
Paper pulp, soil, wood glue, and mirrors

This is her basic recipe:

Step 1: Shred enough paper to fill a one-gallon container. Fill three-quarters full with boiling water. The paper will absorb the water. Mix contents with a wooden spoon. 

Step 2: Cover container with an airtight lid and put mixture aside for a week. (If you have a strong good quality blender, at this point you might blend) Add two cups wood glue, and stir until all shreds are soaked in water and glue. The glue will lighten and fluff the mixture. 

Step 3: After the mixture sits for a week, it will be time to strain the pulp. Place a sieve over a bowl and pour the paper mixture in.

Step 4: Press on the pulp in the sieve with a spoon to remove excess liquid; discard liquid. Add half a cup of rubbing alcohol to the remaining paper pulp to kill bacteria. The texture should be the consistency of tacky oatmeal.

Step 5: Wearing plastic gloves, take a handful of the mixture and form a ball. Knead and shape it in your hands.

Step 6: Place the ball on a flat surface and sprinkle with coffee grounds, tea leaves or paint pigment on the surface. Compress the ball and add more pigment to stain it further and form a coloured coating. Add more liquid pigment to the mixture for additional colour. It now works like paper clay.

Step 7: Shape the paper clay mixture into a sphere, a sausage or whatever shape you desire and begin to explore its formal possibilities. Some forms will work but others will not. 

Step 8: Mould the paper clay over anything you might want to cast, or simply cover, by putting cling film over objects and pressing the paper onto them and then you can link to any other forms you might have made by laying more paper clay around, over and into joint areas and once again pressing tightly to adhere the mixture. 

Step 9: Set the forms to dry (ideally outside in the sun), where the colours will change and cracks may form. As you get used to this process you may begin to add reinforcing materials such as muslin. 

Wangechi Mutu: Sentinel IV 2020: Paper pulp, wood glue, soil, emulsion paint, charcoal, ink, coconut hair, Natal Rhus (Rhus Natalensis), Silver Oak (Grevillea robusta), Croton (Croton Megalocarpus) and Jacaranda (Jacaranda Mimosifolia)

Wangechi Mutu uses paper pulp to bring together various materials, so that they have one harmonious surface. She also mixes into her pulp locally sourced earth and colourants. The materials embedded into her 'Sentinels' all have specific meanings, for instance the African tree 'croton megalocarpus' is known for its high nitrogen content, and its leaves are often therefore used for mulch. Traditional medical uses for croton include the bark, seeds, roots and leaves being used for medicinal purposes such as the cure of stomach ailments, malaria, wound clotting, and pneumonia. This Sentinel also acts as a healer, and as a harbinger of the acute imperative to improve our relationship with each other and our planet or we will have to accept that environmental destruction will inevitably decide the fate of us all.

There is so much paper around that it is a natural material to use for anyone that wants to reflect on a society that creates too much waste. I am suggesting very home made ways of working with paper, but commercial print operations take the making of paper pulp prints to high levels of technical sophistication, in particular it is fascinating to see how the artist Chuck Close used paper pulp technology to have prints made of his portrait work. 

Paper pulp printmaking processes 

Paper pulp printmaking processes: Chuck Close paper prints

See also:

Paper and sustainability
On line books on paper
Research into paper
More thoughts about paper
Paper sizesPaper: Folding and the songs of trees

Friday, 24 November 2023

Stained glass: Session five

Session five was focused on cutting glass. I had to make sure that I had all my pieces cut and ready for session six as this was when the painting sessions would begin. 

I had already made some headway in cutting out the sections needed, and the only parts left to cut for the main image were slightly larger pieces of green and blue glass. This meant sorting through all the offcuts, out of which I managed to cut another five sections, and then I had to use glass from the workshop's stock, in order to finish the central section. 

Each piece of newly cut glass was put into its place on the cartoon and reattached by tape to its paper template. As each section was completed its number was ringed in red on the cartoon. 

I couldn't find a big enough piece of glass for shape 16, so I decided to re-draw the cartoon and make that section out of two pieces. 

Section 16 is now labelled 16 and 16B

In order to transfer the drawing onto the glass, I used the original template for three sides and a tracing from the cartoon for the side now making the join between the two. Finally once the glass sections were cut, I traced the new cut line from the cartoon onto the paper template and cut that out using the paper cutting sheers that take out a thin strip of paper to compensate for the leading. It might seem very pedantic all this attaching paper templates, numbering etc. but with so many pieces to put together for the final image, it is so easy to get lost. Also cut glass sections tend to look very similar, but they have to fit in exactly the right places, or the jig-saw of the window will never fit together properly. 

Earlier sections already cut are marked by red circles

Once all the central sections were cut, it was time to look at the border. I had some pink glass left over and as this was very expensive, decided to use this as part of the border. (It was also an aesthetic decision, as it brought colour from the centre out into the edges). I was then shown how to make sure all border sections were going to be the same width. 

Making sure the border is cut at a right angle. 

By using the first cut strip as a marker, you can align the wheel of the cutting tool up alongside the edge of the right angle, so that it is exactly positioned for a width that will be the same as the strip above. I managed at this point to break a couple of strips, because the pink glass is very thick and uneven. But I cut enough to get out what I needed. 

As pieces were cut they were placed on the cartoon. 

Section 72 was a continuation of the arm (82) and so broke the symmetry of the border 

The border would be too predictable if it was the same all the way round, and so by responding to the visual arc made by the arm coming in from the side, I could both give the border that needed shift to enliven the dynamics and at the same time anchor the arm idea into the edge of the design. I hope it works, but I shall have to see. A bit of a risk, but without risk you cant learn. 

The purple glass

Jo-Ann also had shown me some purple glass she had available. I had used some for the areas filling in around the leg and Sooty, so decided a little could also go into the border. I realised could use it to emphasise the slight off symmetry caused by my introducing section 72 into the design. I have yet to see it all together on the light-box, but I only have 4 border pieces to cut next week, (blues to sit between greens and pinks) and then I can check how it will all look. 

The state of the border at the end of the session. 

Homework for this week was to make studies for the painted sections, because the next few sessions focus on painting glass techniques. 

See also:

Sunday, 19 November 2023

Drawing on Experience

John Dewey wrote ‘Art as Experience’ in the 1930s and set out the centrality of the communication of experience to the practice of art. I have been involved for a while with a research group associated with the university of Porto entitled 'The Observation of Perception, considered through Drawing' and my own research in relation to this has been to explore how we might visualise experiences of interoception. I have posted fairly regularly on the different aspects that I have confronted as the work around this has developed, from a consideration of 'qualia' as the phenomenal quality of experiences, how we now think about inner body perception in an age of CGI, the relative benefits of hand drawn and computer refined imagery when making representations of inner body experiences, how the body and its nervous system construct inner maps of experience, how we might use this process of visualisation for the development of a contemporary type of votive and other issues that are all related to why interoception is an important aspect of perception, especially if we want to reflect the full complexity of perceived information, that comes from both outside and inside of our bodies at the same time. However I'm also very aware that as well as making images about this, which I regard as my primary research, I'm also writing about the process and sometimes forgetting that I'm writing in English and the English language is itself a somewhat limited communication medium. This post is therefore a reminder to check out how other languages deal with issues that are similar, but in their very difference, open out conceptual alternatives. 

The word 'experience' in German can be translated as either 'erfahrung' or 'erlebnis'. 'Erfahrung' represents deep, full blooded experiences that lead to knowledge, whilst 'erlebnis' is a word that stands for more superficial experiences that are perhaps enjoyable but not necessarily profound. In English 'experience' is a thing, but in German it is a quality of perceiving. There is a diagram that might help illustrate this difference. 


In the diagram we have two very different German words for something that is another single one in English. Körper refers to the body as an object, something to which physical qualities can be attributed. Leib, by contrast, implies the body as a subject. 'Körper' represents the physical/material, objective body and 'Leib' the lived/animated, subjective body. In English of course we have the word 'corpse' to define a 'dead' body, but this is not what the German word implies. These distinctions are vital to our reading of phenomenology because the main early thinkers are German. According to Husserl and, then later, Merleau-Ponty who takes his reading from Husserl, 'Körper' is the body-object, while 'Leib' is the lived-living body. In German what it is to be a body (Leibsein) can be contrasted with what it is to have a body (Körperhaben).  Körper stems from the Latin corpus and refers to bodies as physical entities, including celestial bodies, geometrical entities, and dead bodies or corpses. Leib, by contrast, is related to the verbs leben (to live) and erleben (to experience, to go through) and the adjectives lebendig (animated, lively) and leibhaft (in person, in the flesh). As such, Leib refers to the body as it is experienced or lived, instead of the body as it can be measured or quantified. Therefore for my purposes I'm dealing with subjective experiences of the lived body, (Leib) not a set of measured physical bits of objective information that are records of the physical nature of the body, (Körper). 

A representation of stomach cramps (A subjective experience of the lived body)

If we go back to 'erfahrung' or 'erlebnis' we can then open out the two differences in meaning even further. In this October issue of Art Monthly, Matthew Bowman looks to Walter Benjamin and his understanding of the distinctions between 'erfahrung' or 'erlebnis' to open out a reflection on why we are no longer able to sustain 'erfahrung' or deeply felt experiences, and how we use 'erlebnis' as a way to protect ourselves from the constant bombardment of information that is our contemporary state of being. We in effect can only deal with shallow or superficial responses to experience because if we tried to deeply experience the constant flow of stimulus that we are now subjected to, we would seize up and be crippled by information overload. My reading of this is to keep making slow things by hand, things that you can take your time with, rather than trying to make another incursion into the world of mass media. Instead of trying to avoid confronting profound, deep feelings; to cultivate them. To use a sense of 'erfahrung' as something to strive for in your work. Colour, surface texture, tonal variation and other basic elements of image making can be deeply emotional, and we can have profound relationships with both objects and other people. Events still move us. Yes we are subjected to a constant bombardment of information, but we can still recognise the qualitative emotional differences between life changing events, such as experiences of birth, death, and of those special times of unexpected spiritual awareness that can become moments of epiphany. If not, we will become empty, emotionless husks, incapable of deep feelings. In slowing things down, we help ourselves and others to feel more, to attune ourselves to the wider cosmic wonder that we live within. 

A chest pain visualised

A meditation on the body

Sometimes thoughts can be carried in materials in ways that you don't expect. In the image above, I found myself talking in a language of pigment diluted in water. As the image emerged out of swirling liquids, it seemed to develop some sort of harmonic with my own body. This is something that can happen both within and without; can be both portrait and landscape. Finding the right material to work with can be vital, for instance, Sue Bryan's drawings of trees, mainly using charcoal, sometimes achieve a close harmony between the dry crumble of the charcoal, the texture of 'treeness' and the atmospheric emergence of the tree; the 'crumble' and soft smudge of the chosen material representing both object and the space it grows into. 

Sue Bryan

Just looking at a tree or listening to your own body can be antidotes to the constant flow of digital information. So perhaps leave off reading this blog and go outside and look at stuff. With a pencil in your hand, examine a tree and when you are ready, begin to draw it or if you are stuck inside think about what it feels like to hold a pencil, and draw that. 

See also: 

The magazine PSIAX issue 7  This link is to a PDF download of the magazine which includes my recent article on visualising interoceptual experience

Qualia

Surface and inner body perception in an age of CGI

John Dewey

Considering analogue and digital drawing processes in relation to the visualisation of inner body experience

Maps made by our nervous systems 

Drawing and healing traditions

Why interoception

Tuesday, 14 November 2023

Stained glass: Session four

 Most of session four was devoted to cutting glass but an important decision had to be taken at the beginning of the session related to the fused glass section which had been fired during the week. The fused frit circular element, that I had made to represent heel pain was now finished and it posed a few issues. The first was that although it was the right thickness it was lumpy. I could have it re-fired but I decided I liked the look of it and would like to keep it as is. This will make it hard to clean when working on fitting and holding the leaded sections together later on, but I think it will be worth it. The other issue was that I made the circular shape larger than I needed it in relation to the original design, so that I could cut it down afterwards. Now that I have decided to keep the lumpiness, it is impossible to cut, so that It was decided to grind down the edges, and to smooth out the curve, but to maintain the more organic edge, as opposed to the original shape which was drawn using a compass. 

Fused glass made of various course and fine frits

You can just about see the sharp bits on the edge and the fact that sometimes the edge dips inwards, I needed to remove both sharp edges and smooth out the indentations.  

All-Star Glass Grinder

The workshop has an All-Star glass grinder, the main thing to beware of is forgetting to use goggles or to have glasses on to protect your eyes. A smooth movement is needed to keep the curves smooth. (Nb the company that makes these is no more, so replacement grinder heads will be very hard to find)
 
Once the edges had been smoothed off the new shape is placed over the cartoon 

Once in place the Black Sharpie drawn lines indicating the edges between sections of glass, are extended using a white Sharpie onto the fused frit glass circle. An arrow is also drawn so that it is easy to find the top edge. A new more organic circle shape is now drawn using the edge of the glass circle as a template. 

The new shape is drawn and the old one slightly greyed out using the white pen

The new shape cuts into the sections surrounding it, so the first thing I have to do is trace this onto the pieces of pink glass I have already cut. Then I go back into glass cutting mode, first of all recutting the pink and then using the adjusted cartoon, alongside the template sheet that I still continue to cut out, to draw up as many pieces of glass as I can, searching through the trays of glass off-cuts for pieces that are slightly bigger than the paper templates. 

Marked up glass pieces with their paper templates

Once cut I was able to place the sections on the light-box to check how the colour was working. 

Cut pieces set out on the light-box

The 'fit' between sections of cut glass can now also be checked. In this case they seemed to fit pretty well, close enough to not need any immediate grinding off, but when we come to the reality of fitting it all together with the leading, some adjustments will inevitably need to be made. I am personally reassured that I am getting better at the glass cutting and am making less mistakes. In particular I am getting better at controlling the weight of the cutter when making changes in the curve direction when scoring. 
The rest of the session was me cutting glass, including the amber range of glass for the Sooty figure and more small sections of green and blue. By the end of the session I had only 10 pieces of the main design left to cut, but these are larger and I might have to buy in glass for these. Then finally we will look at cutting out glass for the border. 

See also:


Friday, 10 November 2023

The drawings of Henri Michaux

Henri Michaux: Visage

Every now and again a particular artist re-emerges as being of vital importance to me and because of my interest in visualising the body, by combining the visualisation of inner and outer perceptual experiences, the frottages and drawings of Henri Michaux have come back into focus. I was reminded of his work by a reviewer of a paper I had submitted about my own drawings, the reviewer pointed out that Michaux had explored a similar territory many years before and that I had not referred to this. Sometimes reviewers pick up things that really make you think again and in this case I must admit I realised I had not really thought through certain aspects of what I was writing about and that the paper I had submitted did indeed need some serious revision. Probably the most serious error I had made though, was that some of the particular issues I should have picked out in the paper were ones I had written about before and I had simply left them out, my mind having a 'been there, written about that' response, forgetting that I am probably the only other person to have read what I was thinking about before, and that without some precise information about how drawing can solve certain problems, the writing didn't really make sense. 

Henri Michaux: Visage

I mentioned Michaux's work in conjunction with Unica Zurn a few months ago, but he is well worth looking at as an artist in his own right. 


Henri Michaux: images

Michaux became famous for taking mescaline but his drawings were never done under the influence of the drug, in fact he said that drawing was impossible whilst under its influence. However the visions he had of the mind working, were strong and they directly influenced his approach to image finding. His idea, of finding images in the process of making a drawing is not new, but his particular take on the idea was that he was finding out about the structure of the brain itself. This has helped myself when working to sometimes just let images become what they need to be, to allow them to emerge and in that process to look for a synergy with my own inner body language, the language of feeling tone, of stomach ache and backache, of inner excitement, of breathing in and out, of feeling fine or feeling down, all perceivable embodied moments, that can be thought of as interoception. I've also now re-written that paper, 'Drawing the embodied mind' and it is available in edition 5 of the magazine PSIAX. 

The Silence of the World: Henri Michaux

The Silence of the world is one of Michaux's hallucinatory representations of faces. A half remembered image perhaps from a book on pre-history, from a police forensic investigation file or a 1950s pulp science fiction comic. It sits between readings, half a face, a single tooth protruding, as in an old battle weary smilodon. There is something about Michaux's images that take me back into the world of the half seen, half dreamed, remembered something that sits on the edge between perception and reverie. His images enter the world of magic via an oblique direction, they find their way into our brains via the root of the fetish, and engage us as awkward strangers do. 
Perhaps above all Michaux's work reminds me that you need to tune yourself into the world of things that are 'other' than yourself, if you are ever as an artist to find those images that surprise you, that come from nowhere but somewhere. If I could tap into the logic of an apple, or think with the brain of a crystal or smell with the nose of a dog, then perhaps I would be able to draw with the eyes of a bacteria. 

Reference

Barker, G. (2021). Drawing the Embodied Mind: A Project Report on Research Into Interoception. PSIAX #5 ESTUDOS E REFLEXÕES SOBRE DESENHO E IMAGEM, 5. pp. 17-24. ISSN 1647-8045.

See also: